To start, a shot of a stunning pink flower of a weird cordyline type plant at the new studio - stunning!

And then to pottering. Whilst my anxiety about the world and the future is receding slightly (mainly I think because we appear to behaving as a nation and doing sensible things with good outcomes) I am not yet back near anything I would call peak performance! I am definitely still a bit skittery and finding that time is an odd thing - slippery and stodgy at different times. So I am manly pottering in the studio and using the time to do some of those what if? or how do I? s that I often think about in passing, but don't get back to doing.
This week I decided it was time to try out some metallic dusting powder I had bought when we were in Scotland last year. I thought it might be nice to dust it onto black or other colour ink to give it a golden touch, rather than using up lot of metallic ink. Metallic ink can also be a bit hit and miss - it is always hard to get the metallic pigment bits to stay evenly mixed and not just fall to the bottom of any pot and so on.
So as Barry was madly printing away the back of over 200 postcards, I nicked into the production line to print two for myself to practice on.

The dusting powder is very fine - so precautions re breathing were taken. Whilst the ink was still wet, I dusted a wee bit of powder on. Gold and copper.


And because I am pretty impatient, I dusted it off again after about 5-10 minutes. And was pretty chuffed! I think we will find nice ways to use these powders.

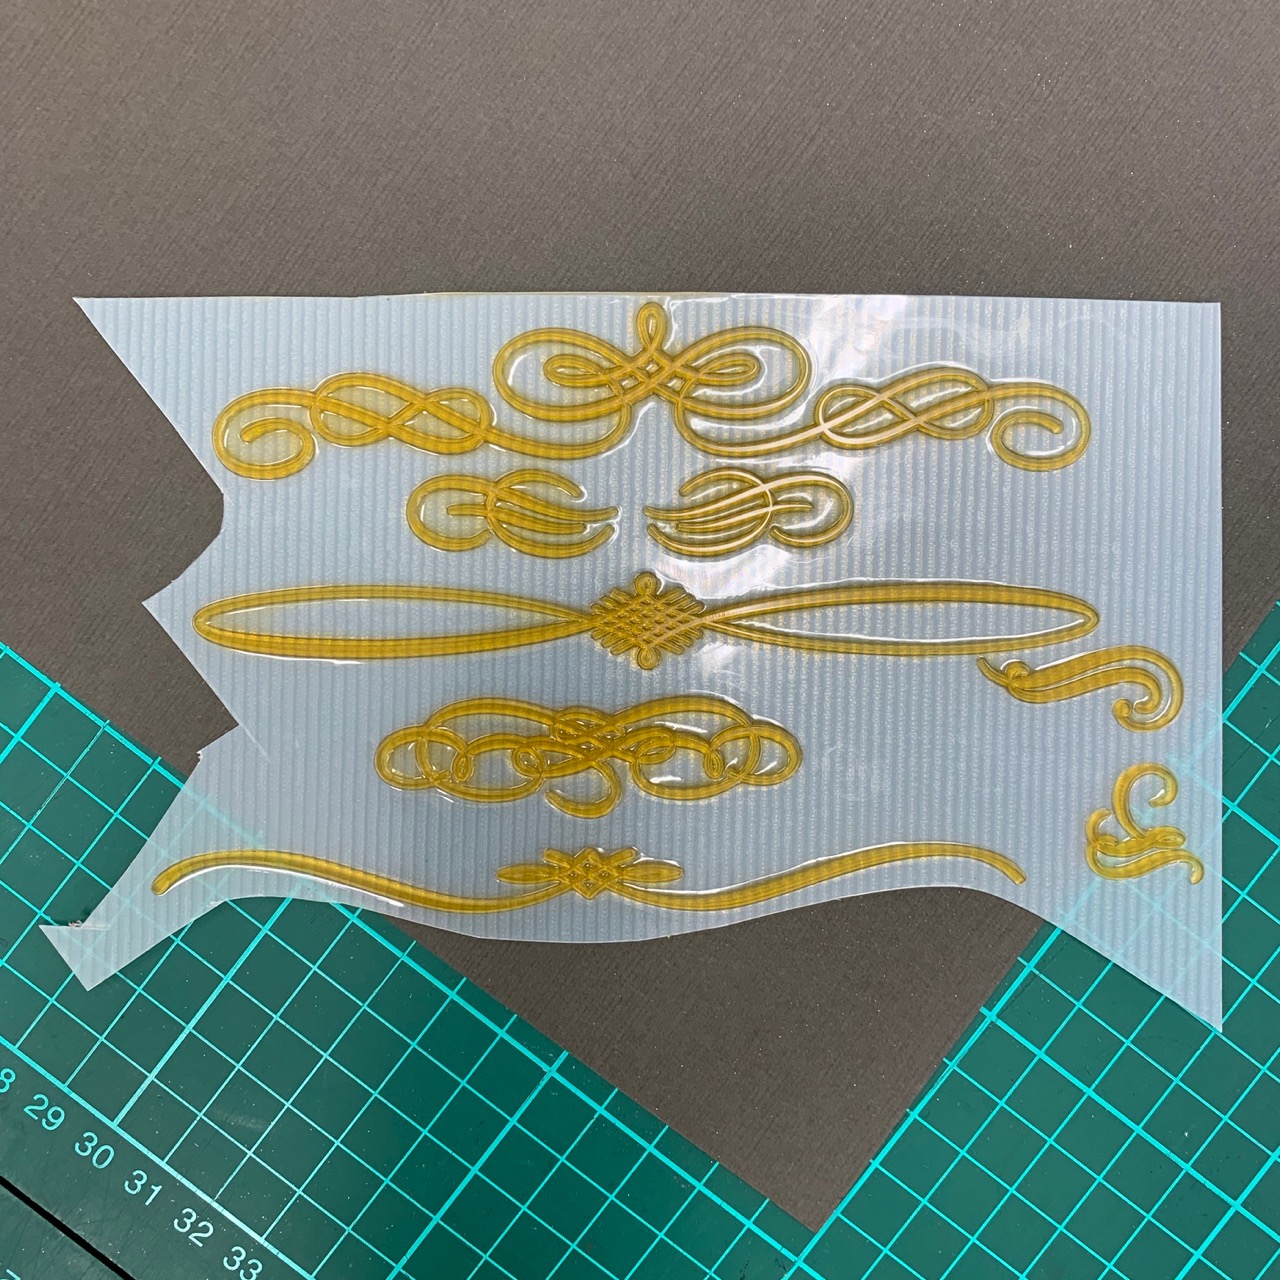
Another thing I bought when in Scotland was a sheet of polymer plate flourishes. I am a traditional type kind of letterpress gal; but thought a few flourishes could come in handy every now and again. So they have sat there for a while now and I thought if not now, then when? Laugh. I am not made for modern ways...
I have had limited success with polymer plates and as ever, teaching yourself can mean a whole lot of dumb things happens and mistakes get made. Still, I thought I should have another go.
So I cut one out and attached it to a piece of timber I had had cut to make type high.

Pretty happy with what came about - could be useful. It was crisp and clean around the edges which was great. But boy did I have trouble making it stick on the block.

I thought I should test out a few more so cut out quite a few from the plate - it was good buying! Lots of different flourishes.

They were all set on blocks and I thought this would test a good few of them.

Again - struggled to get them to stick.
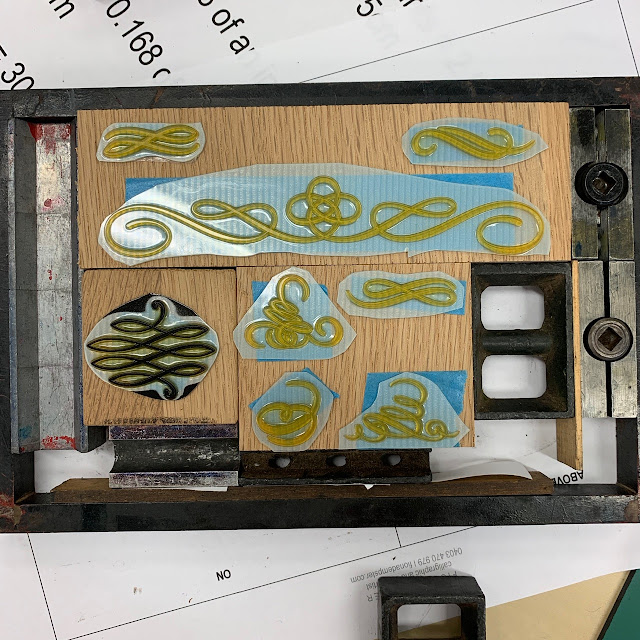
Two fell off as I put them through the press. Clearly this was not going to be a thing I could ever use if they just fell out willy nilly.

The general look and feel of the print was good (except for the two gaps issue) so I wanted to check if I could find out what had gone wrong.

I laughed so hard. A quick google about the type of plate (it has some serial number on it) and I found the bit where the advice says "replace the blue protective sheet after each use to maintain the plate's adhesive capability".
I went to the drawer where I had packed them away; picked up a piece; and slowly, gently and with stifled and muffled hilarity pulled back the blue protective sheet to discover a significant and magnificent layer of stickiness on the actual plate!!!
There's always next time. Stay tuned. Grin.

And then to pottering. Whilst my anxiety about the world and the future is receding slightly (mainly I think because we appear to behaving as a nation and doing sensible things with good outcomes) I am not yet back near anything I would call peak performance! I am definitely still a bit skittery and finding that time is an odd thing - slippery and stodgy at different times. So I am manly pottering in the studio and using the time to do some of those what if? or how do I? s that I often think about in passing, but don't get back to doing.
This week I decided it was time to try out some metallic dusting powder I had bought when we were in Scotland last year. I thought it might be nice to dust it onto black or other colour ink to give it a golden touch, rather than using up lot of metallic ink. Metallic ink can also be a bit hit and miss - it is always hard to get the metallic pigment bits to stay evenly mixed and not just fall to the bottom of any pot and so on.
So as Barry was madly printing away the back of over 200 postcards, I nicked into the production line to print two for myself to practice on.

The dusting powder is very fine - so precautions re breathing were taken. Whilst the ink was still wet, I dusted a wee bit of powder on. Gold and copper.


And because I am pretty impatient, I dusted it off again after about 5-10 minutes. And was pretty chuffed! I think we will find nice ways to use these powders.

Another thing I bought when in Scotland was a sheet of polymer plate flourishes. I am a traditional type kind of letterpress gal; but thought a few flourishes could come in handy every now and again. So they have sat there for a while now and I thought if not now, then when? Laugh. I am not made for modern ways...
I have had limited success with polymer plates and as ever, teaching yourself can mean a whole lot of dumb things happens and mistakes get made. Still, I thought I should have another go.
So I cut one out and attached it to a piece of timber I had had cut to make type high.

Pretty happy with what came about - could be useful. It was crisp and clean around the edges which was great. But boy did I have trouble making it stick on the block.

I thought I should test out a few more so cut out quite a few from the plate - it was good buying! Lots of different flourishes.
They were all set on blocks and I thought this would test a good few of them.

Again - struggled to get them to stick.

Two fell off as I put them through the press. Clearly this was not going to be a thing I could ever use if they just fell out willy nilly.

The general look and feel of the print was good (except for the two gaps issue) so I wanted to check if I could find out what had gone wrong.

I laughed so hard. A quick google about the type of plate (it has some serial number on it) and I found the bit where the advice says "replace the blue protective sheet after each use to maintain the plate's adhesive capability".
I went to the drawer where I had packed them away; picked up a piece; and slowly, gently and with stifled and muffled hilarity pulled back the blue protective sheet to discover a significant and magnificent layer of stickiness on the actual plate!!!
There's always next time. Stay tuned. Grin.
I think we all need some twirls and swirls at the moment.
ReplyDeleteWhat make is your dusting powder and where did you buy it? I've been struggling with metallic ink and this looks like it might be a way to try.
HiJac - have found them they are Roberson's bronzing powders https://www.croberson.co.uk/roberson/19/ and I hope they might work for you. I got mine from Lyme Bay Press. Good luck!
Deleteoh that copper stardust is beyond perfect ...
ReplyDeleteand love your self-tell ... reading instructions is usually not my first impulse (ready fire aim)
Oh liz I love that ready fire aim thing! I am a bit of a bull at a gate person sometimes and just reckon I will figure it out. Gee I laughed. The fairy dust stuff is great isn't it?!?!?!
DeleteThe next step now is EMBOSSING POWDER. Are you sure that what you have isn't EP? With them, you dust it onto the wet ink, and shake off the excess, and then heat the powdered paper until the power melts and makes glossy foil-like effects. I used it for my Melinda Smith MOAD work (https://carenflorance.com/portfolio/be-spoken-to/). There are dedicated vintage machines out there which look like the rolling toasters that businesses and boarding schools use, but I worked originally with a hairdryer and then with a heatgun (which I'm sure Barry's got!). It takes a little practice not to burn the crap out of things but when it's good, it's awesome. You can get embossing powder from scrapbooking supplies these days. xx
ReplyDeleteI had forgotten bout embossing powder - back int eh day i am sure I had soem for scrapbooking! I think I initially tried to warm it up above a hotplate on the stove, then graduated to a hair dryer. We do have a heat gun so watch out. I will probably have to track some down but sounds like an excellent project for these times as well. It looks stunning on that work of yours - especially on the brown paper - yum!
ReplyDelete